Envelope tutorial
Material
Bill of material:
- PE foil
- A roll of Paper (1 m wide)
- Tape
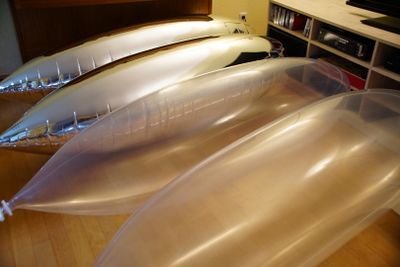
In this tutorial we describe how to easily build an airship envelope with a variable size of up to about 3 m length. The envelope will be welded because this way the most tight and strongest joints of the material can be generated. You´ll need a thin weldeable foil. A good choice is a foil made of or partially coated with Polyethylen (PE). This kind of material can be found at various places. It is used as packing material, capacitors are mode of this and the bags of potato chips as well. A PE layer makes the material easy to weld, while a layer of aluminium can make the envelopes gas tight for weeks, but is not essential. Beneath choosing a material that is weldeable you need very thin foil. The thicker it is, the heavier. To make an airship of about 2 m length flying you should find a material with a thickness of 20µm to 60µm. As a rule of thumb one µm makes up 1 g per m². A good compromise between weight and strength is usually found between 25 g/m² and 40 g/m².
Further you need a roll of paper to make the template for welding the envelope and lots of tape to fix everything to your working table.
Tools
- Iron
- Knife/Scissors
- Folding meter
- Pens
- A very large smooth table or the floor of a room
The PE foil will be welded by using a common iron. The shape of the envelope is defined by the template we are going to prepare in a minute. The welding process itself needs a perfectly smooth and clean surface with the size of the envelopes template. Even the smallest piece of dust at the wrong place can lead to a leak.
Preparations for the template
It´s relatively complex to calculate the pattern of a 2D shape that becomes a nice aerodynamical 3D shape once inflated. Luckily Johannes Eissing has created an excel sheet that helps you to find the coordinates for such a 2D pattern. You can get the template under the following link:
Using this excel sheet you can accurately calculate the dimensions of your airship envelope. In this tutorial we make an envelope just from 2 gores (nG = 2). Making envelopes with more gores yields more beautiful results and is often worth the efforts. However it is magnitudes more complex and not covered by this tutorial. Using the last three columns of tab 3 of the excel sheet you can draw the necessary welding pattern on the roll of paper.
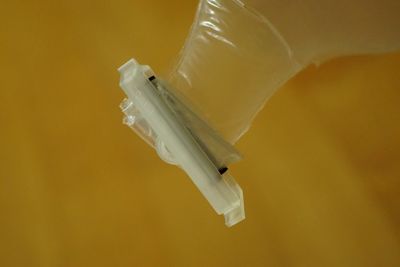
We have also prepared a huge PDF of the envelope template of the silent_runner I4. File:iris_sr_vector_anleitung.pdf Using this PDF you can even print it on a plotter. At the tail of the airship you need to create a tube that acts as the vent like seen in the PDF. This tube should be about 2-3 cm wide to enable inflation as well as deflation. Once inflated this tube is folded and closed with a clip.
Welding
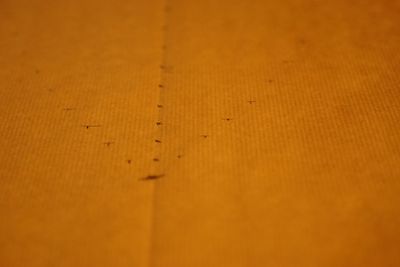
Now it get´s exciting. First use some pieces of foil material to train your welding skills. You need to find the right speed, temperature and pressure to make good seams. If the material burns you´re too hot, if the seams get loose easily you are too cold. Setting the iron to cotton (250 °C) is usually a good starting point. A good seam does not tear apart before the foil itself if you pull it strongly. Now clean the working place and spread the two layers of foil. Make sure they are flat without any wrinkles. You can tape them to the table. Now role the template over the foil. Put some weights in the middle of the template to prevent it from moving. Set the iron to cotton and wait a few minutes until the temperature is stable. Now start from to tip of the airship on to move the edge of the iron over the line of the template. It is important to move with steady speed and pressure to maintain a good welding quality over the whole seam. This is the most critical step of the whole procedure so take your time. When you have welded everything slowly remove the template from the foil and check your seams. It´s possible to visually assess the quality of your seams and sometimes it´s worth to repeat the welding to ensure the seam is tight. After that use a sharp knife to cut out your airship close to the seam.
If you like to paint/spray something on your airship envelope now is a good time, while it lays perfectly flat on the table. Perform a test inflation using cold air from a hairdryer (Set to cold!!). If everything is done well the envelope does withstand the pressure created by the hairdryer. To remove wrinkles on the inflated envelope you can gently heat the wrinkle with the hairdryer (set to hot).
Links:
Here is a video of all the steps in a timelapse: https://www.youtube.com/watch?v=aO7twPXnclk
If you like to make envelopes with more gores you can ask the experts at: http://www.heliumheads.de/
A similar tutorial by John Piri can be found at: http://www.indoorblimps.com/freeplan.htm
A tutorial by Alan Sherwood how to make beautiful envelopes by gluing mylar can be found here: http://www.rcgroups.com/forums/showthread.php?t=489372


